Feeds:
Posts
Comments

It has been a while!  I did not disappear – I was enjoying a decadent dark chocolate cake with a glass of Merlot at the Fairmont Olympic Hotel in Seattle.  Is there anything as decadent as room service?  I was there for a training and had a couple of posts lined up, but didn’t have time to do much other than study, eat, sleep, and enjoy the health club facilities with the perfect morning coffee and free bottled water.  (I still can’t believe that they are charging $8.00 for a bottle of water if you dare to open it in your room.)

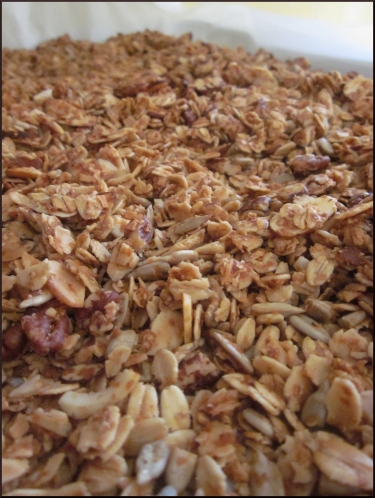
Then, in the midst of taking a family picture, I sacrificed my little camera by attempting to use the back of a chair as a pedestal.  So, I am without a camera (until a new one can be found and bought) and I have only a couple of pictures of some granola to share with you.

I started making homemade granola about 6 months ago when cereal costs shot through the roof.  I am floored sometimes by how much they charge for a box of the stuff.  I know you can find it on sale, but seriously, $5.00?  That’s crazy!  Plus, it isn’t all that great for you (or if it is, it looks like little fiber sticks and tastes terrible.)

A friend of mine at work introduced me to the world of King Arthur Flour.  If you haven’t been by their web site, cruise over and take a look.  Aside from selling a slew of hard-to-find baking items, they have an entire index of wonderful baking recipes.  I like granola, but have never been a huge fan until trying out this recipe.  It is full of nuts that add crunch, sweetened with natural maple syrup, and it gives the impression that it might even be good for you by adding in wheat germ.  The other great thing is that it is made using a kitchen scale which makes it come together really quickly and easily.

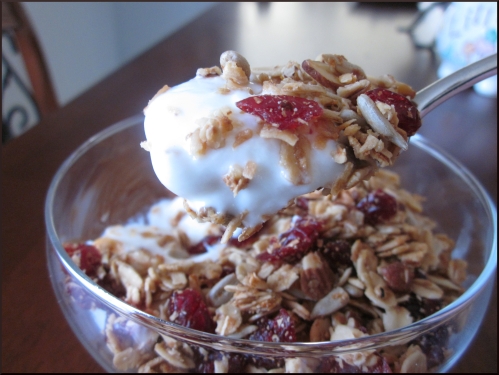
It has become a breakfast staple in our home and I love to eat it on top of some Nancy’s Honey Yogurt.

Crunchy Granola
adapted from King Arthur Flour

7 cups (1 1/2 pounds) rolled oats,  uncooked
1 cup (4 ounces) flaked unsweetened  coconut (optional, but good)
1 cup (4 ounces) stabilized wheat germ
1 cup (3 1/2 ounces) sliced almonds
1 cup (4 ounces) diced pecans or walnuts
1 cup (5 ounces) sunflower seeds, raw or toasted
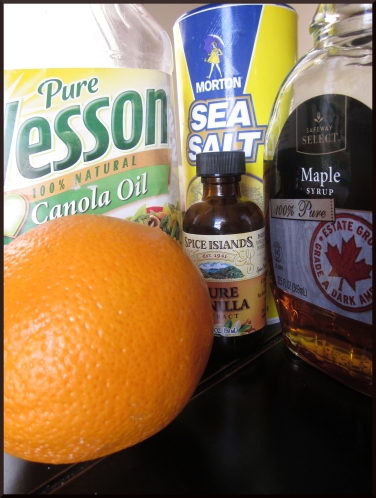
zest of one orange
1/2 cup (3 1/2 ounces) vegetable oil
1/2 teaspoon salt
1 cup (11 ounces) pure maple syrup
1 tablespoon (1/2 ounce) vanilla extract
2 packages pomegranate infused cranberries

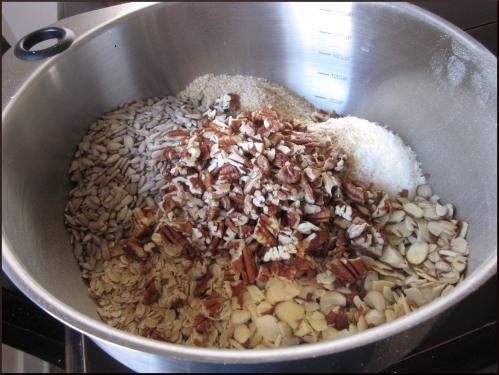
Place a large bowl on top of your scale and tare it.  Mix together the oats, coconut, wheat germ, almonds, pecans, sunflower seeds, and orange zest.  In a separate bowl, stir together the vegetable oil, salt, maple syrup (don’t try and use anything other than pure maple syrup), and vanilla extract.  Pour the liquid ingredients into the dry and stir together until completely mixed.

Line two baking pans with parchment paper and divide the granola onto the two baking pans.  Bake @ 250 degrees for 90 minutes, swapping the pans (rotating levels and turning around) each 15 minutes.*  Rest the granola in the pans until completely cool.  Pour back into a bowl and mix in the dried fruit of your choice (I used cranberries).  Store in an airtight container.

I have also made the following variations and loved each one: dried blueberries with lemon zest or no citrus zest and just dried cranberries.

*I use the edges of the parchment to move the granola around by lifting the sides and allowing it to pool in the center and then leveling it out again.

So…how do you enjoy your granola, with milk or yogurt?
Lillian and I had a play date last Saturday with a friend of mine and her daughter.  Originally, we had planned to go out for coffee, but with a typical wet and rainy northwest day upon us, I decided coffee at home with some homemade goodies was more enticing.  As a working mom, mornings usually are so rushed that I usually don’t have time to enjoy a cup of coffee.  I could get out of bed earlier, I supposed, but that usually doesn’t happen.  On the weekends, when I can have cup after cup of coffee in a large mug while wandering around in my PJ’s, I truly feel decadent and relaxed – it doesn’t take much.

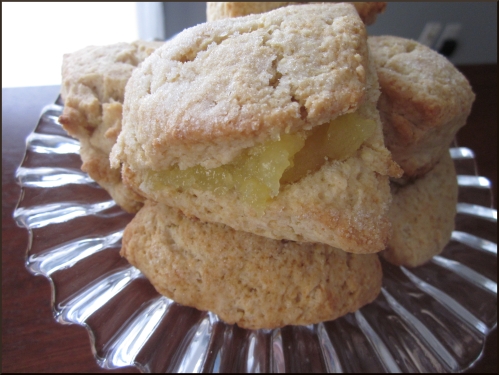
The bad thing about this morning was I decided to make scones about 20 minutes before my friend was supposed to arrive.  Thankfully, homemade scones take only 25 minutes to prepare (including baking time) and are one of my favorite things on earth to have for breakfast.  I also happened to have some lemon curd in my fridge.

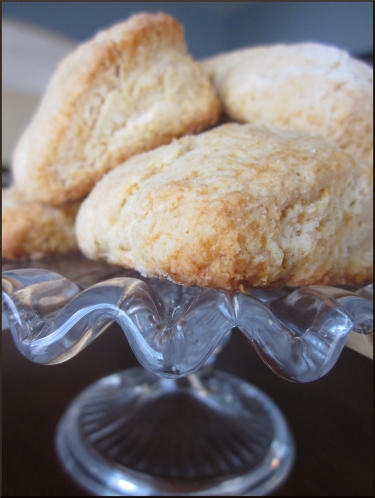
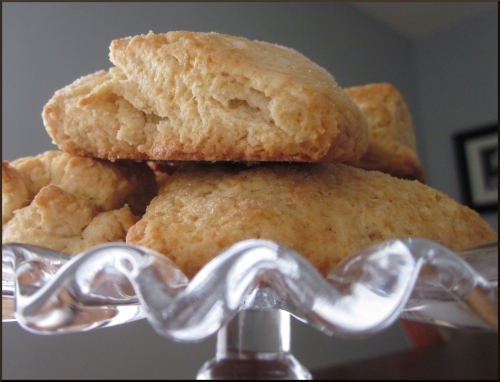
These scones really are wonderful, containing two of my favorite ingredients:  heavy cream and butter.  They have a dusting of granulated sugar on the top which adds to the crunch when you first bite into them, but they are soft and flaky on the inside.  The perfect conduit for some lemon curd or homemade jam.

Cream Scones
makes 16 scones
adapted from Savory Sweet Life

2 cups (9 oz) flour
1 Tbsp baking powder
4 Tbsp sugar
1/2 tsp salt
4 Tbsp cold unsalted butter, cut into cubes
3/4 cup heavy cream
1 egg slightly beaten
1 tsp. of vanilla
2 Tbl. of sugar for sprinkling on top

Preheat oven to 400 degrees

Using a fork, lightly mix together the flour, baking powder, sugar, and salt.  Using a pastry cutter or a fork, cut in the butter until mostly combined and the mixture resembles coarse meal.  In a liquid measuring cup, measure the whipping cream and add to it the slightly beaten egg and vanilla.  Add the liquid to the flour mixture all at once, tossing the dough lightly with a fork to combine.

Form the dough into a log and separate into four equal pieces.  On a lightly floured surface, and using your hands, form each piece into a ball – flattening it slightly with your hand to make a disk.  Take your fingertips and press down on the outside of the circle so that the center is higher than the perimeter.  (This is what will give the scones that wedge-like appearance.)

Cut the circle into four wedges (like a pie) and place on an baking sheet.  Duplicate this process with the remaining three sections of dough.  Sprinkle a light dusting of granulated sugar on top of the scones and bake for 15 minutes or until lightly golden and puffed up.

Serve with butter and jam or lemon curd

What is your favorite quick breakfast treat?
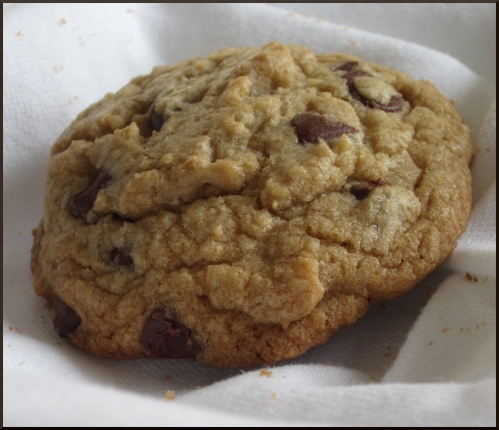
In the years right after college graduation, I lived in this historical neighborhood in Pasadena, CA with two friends.  Aside from our penchant for dating guys named Ryan (hence our rat by the same name that died a very sad death in the attic), we all had a deep deep love for all things sweet – especially chocolate chip cookies.

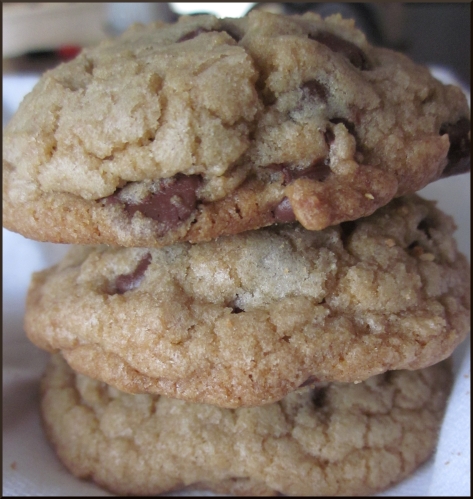
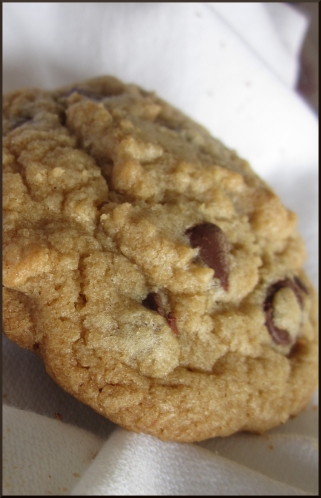
One night, Kendra happened to mention that her mom had a great Chocolate Chip Cookie recipe that she loved.  We were having such a bad chocolate attack that we made her bug her mom (meaning several phone calls and a couple of messages) to get the recipe.  We were NOT disappointed.  This is BY FAR the best chocolate chip cookie recipe that I have ever had.  It makes such a huge batch of cookies that I always have leftover dough that I freeze into a couple of logs for baking whenever we need them.  I have made this recipe so many times, that when I brought it out for this post, I actually had to write over the ingredients list since the writing had faded.

Chocolate Chip Cookies

1 lb unsalted butter, room temperature
2 cups dark brown sugar
1 1/2 cup white sugar
3 eggs
2 T vanilla
6 cups flour
1 1/2 t baking soda
1 1/2 t salt
24 oz semi-sweet chocolate chips

preheat oven to 350 degrees

Cookies: In a standing mixer fitted with a paddle attachment, cream together the butter and sugars.  Once they are mostly combined, turn the speed to medium, set timer to three minutes, and let it go.  In a separate bowl, combine all of the dry ingredients.  Once the timer goes off, and the mixer on slow, incorporate the dry ingredients into the butter/sugar.  Fold in the chocolate chips.  I often have to finish the mixing with my hands since the dough is so thick and there is SO much of it.

Using a medium sized cookie scoop, drop the cookies onto a cookie sheet and bake for 12-16 minutes.

Allow the cookies to set on the sheet for 1 minute before putting them on a cooling rack.

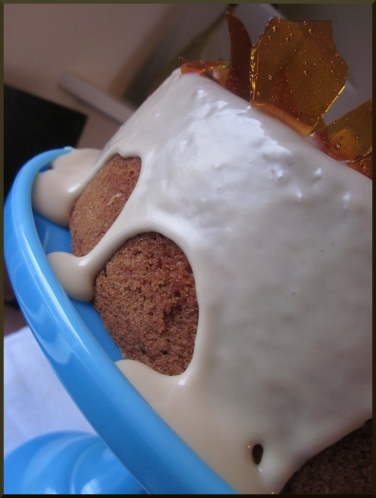
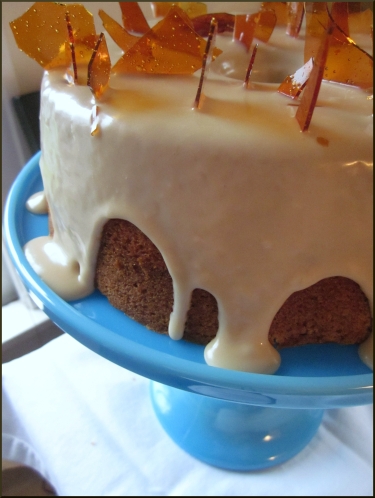
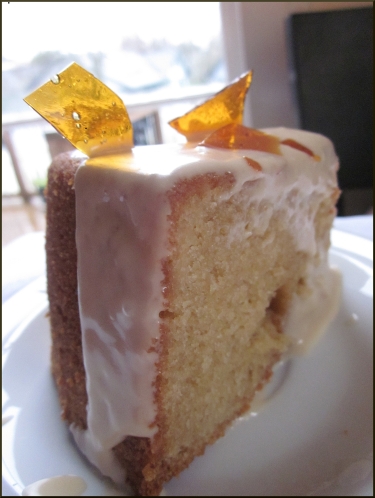
I posted a picture of the completed cake on the BAKED facebook page and listed the things I thought I could have done better (I was still recovering from the pasta debacle):  The cake batter was too light meaning I didn’t burn the sugar enough, the frosting was runny, and the shards on the top of the cake resembled those glass pieces roofs have in Southern California to keep the birds away.  I felt a little better about it when  their facebook moderator said it looked great – didn’t answer my question about the amount of rum the recipe called for, but it did make me feel like I hadn’t totally flubbed it up.  Thankfully, regardless of how it looked, it tasted very good and has already been shared with two sets of grandparents.

My favorite part of making it was creating the shards for the top – and getting to use my new cake platter that I got for Christmas.  I think it would make any flop look amazing.

Don’t get me wrong, the cake tastes wonderful.  Like all the recipes in Baked Explorations, it is a twist on something you have probably made before – a normal bundt cake.  The addition of the coconut milk adds richness and moisture, the rum in the frosting is just plain good, and the shards give it a kind of other-wordly appeal.


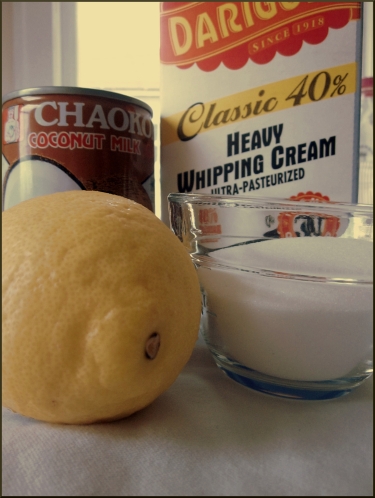
Burnt Sugar: In a medium sized saucepan over medium heat, melt the sugar until it reach a dark amber color, stirring constantly.  Once the right color has been reached, remove from the heat and whisk in the heavy cream, adding it in a slow drizzle so that the sugar doesn’t clump.  Put the pan back on medium heat and cook an additional 2 minutes, stirring to smooth things out.  Pour the caramel into a 2 cup measuring cup (heat proof) and add in coconut milk until you have 1 1/4 cups of liquid.  Stir in the lemon juice, divide the liquid in half and set aside.  Half will be used for the cake and half for the frosting.

Cake: Whisk together the dry ingredients.  In a standing mixer fitted with a paddle attachment, cream together the sugar and butter until light and fluffy – about 3 minutes.  Add the eggs one at a time, thoroughly incorporating and scraping down the sides of the bowl after each egg is added.  Pour in the vanilla, mix for a short time, and then grab your flour and 1 of the portions of the burnt liquid.  In three additions, alternately mixing in the flour and the burnt liquid, beginning and ending with the flour.  Pour the batter into a bundt pan sprayed with non-stick spray.  Bake in a 325 degree oven for 45-50 minutes.  (My cake took almost an hour to bake)

Once a toothpick comes out clean, cool the cake IN THE PAN on a cooling rack until completely cool.  Run a knife around the edges, invert onto a cooling rack, and pray that it comes out cleanly.

Frosting: Using a food processor or a standing mixer fitted with a whisk, beat together the butter, powdered sugar, rum, and remaining burnt liquid.  From my experience, I would start with only 1 t of the rum and then add in more as you see fit.  I followed the instructions perfectly and my frosting was very drizzly.

Burnt sugar shards: in a medium saucepan over high heat, cook the sugar and 1 t water until the sugar is a dark amber color.  Immediately pour onto a silpat lined baking sheet.  The sugar will flow out over the pan and harden really quickly.  Once it is cool, pick it up and break it into shards.

Assembly:  Pour or frost the cake with the frosting and place the shards on the top.  I actually put a little pressure on them and used the cake as a base so they would stand up.  Slice and serve!

Burnt Sugar Bundt Cake
adapted from Baked Explorations

Burnt Sugar Liquid
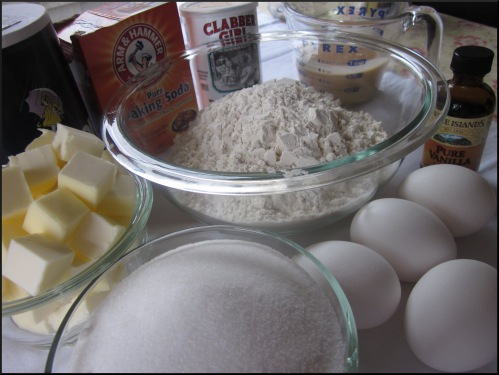
1/2 cup sugar
1/2 cup heavy cream
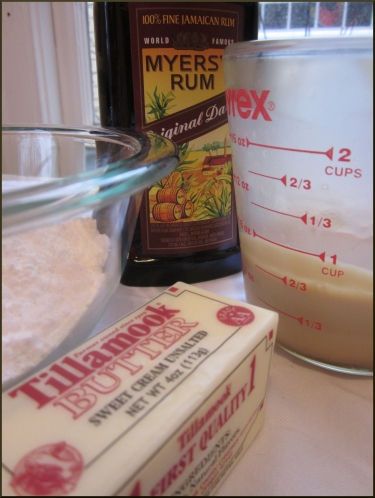
enough coconut milk to make 1 1/4 cup liquid (3/4 cup)
1 1/2 T lemon juice

Bundt Cake
3 cups flour
1 t baking powder
1/2 t baking soda
1 t salt
1 1/4 cup unsalted butter (cut into small cubes)
2 cups sugar
4 large eggs
1 t vanilla extract
1/2 of the burnt sugar liquid

Caramel Rum Frosting
1/2 cup unsalted butter
2 T dark rum
2 1/3 cups powdered sugar
1/2 of the burnt sugar liquid

Burnt Sugar Shards
1/2 cup sugar
1 t water

Preheat oven to 325 degrees
Burnt Sugar Liquid: Cook the sugar in a medium saucepan over medium heat until a dark amber color, stirring constantly.  Remove from heat and slowly pour in the heavy cream, stirring constantly to help prevent clumping.  Return to heat and stir until smooth – about 2 minutes.  Remove from heat again and pour into a 2-cup measuring cup (like Pyrex) and then pour in enough coconut milk so that you have 1 1/4 cup liquid – it takes about 3/4 cup of coconut milk.

Bundt Cake: Whisk together the dry ingredients (flour, baking powder, soda, and salt) and set aside.  Cut the butter into small cubes and using a stand mixer fitted with a paddle attachment, beat together the butter and sugar until creamy – about 3 minutes.  Add in the eggs one by one, scraping down the sides after each egg is completely combined.  Stir in the vanilla.  In three separate additions, add in the flour and liquid alternatively, beginning and ending with flour.  Give the batter one final stir with a spatula, making sure to get all of the flour off of the bottom of the bowl.  Pour into a bundt pan prepared with non-stick cooking spray.  Bake for 45-50 minutes or until a tooth pick comes out completely clean.  Place onto a cooling rack and allow it to cool in the pan.

Caramel Rum Frosting: In a food processor, mix all of the ingredients together at once, adding a little bit more liquid or powdered sugar (in 1/4 increments) until it is a consistency you like.  (I would start with 1 t liquid and add as necessary.)

Burnt Sugar Shards: In a medium saucepan over high heat, mix together the sugar and 1 t water.  Cook, stirring constantly, until the sugar is a deep amber color.  Pour immediately onto a silpat lined baking sheet.  Allow it to cool and then break into shards.

Assembly: Place the cake onto a cake platter or serving plate and frost.  Top with the caramel shards, slice and serve!

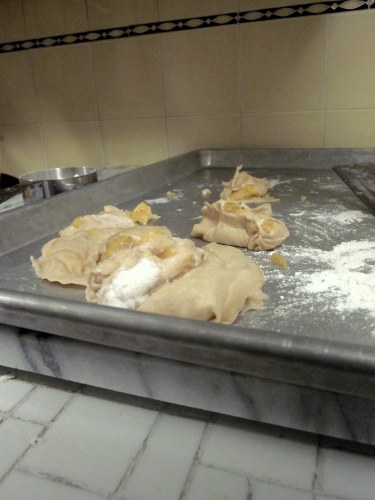
My first attempt at Ravioli.  MISERABLE failure.

I definitely should have read the whole recipe.

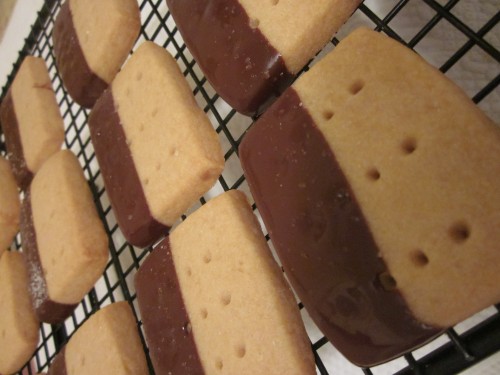
As much as I love over-the-top desserts, I also love cookies or treats that have very few ingredients but pack a big punch.  The other night I was feeling like shortbread.  Something about the crunchy and butter cookies was calling to me.  I have always thought that shortbread was something that you couldn’t really get wrong, but trust me on this – YOU CAN.  It can taste like flour or it can not bake up evenly, leaving you with a chewy center.  None of those things will happen with this incredibly easy recipe.  I have made it twice in the last three days (and yes – I did figure out the weight watcher’s points, and no – I did NOT eat them all myself.)  What are workplaces for if not to welcome your weeknight baked goods with open arms!?
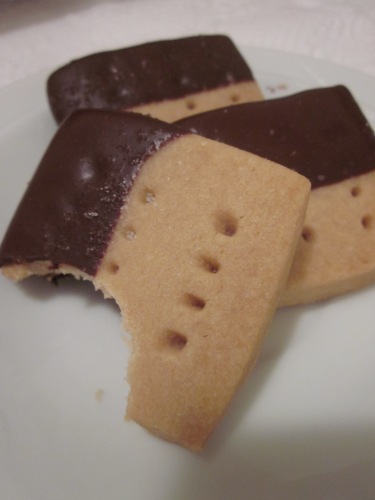
These shortbread cookies have three main ingredients.  That’s right – just three – most of which you should have in your kitchen right now.  Unless, unlike me, you remembered to bring your 8 pounds of butter to your holiday baking day and didn’t leave them at home necessitating the purchase of 8 more pounds of butter – I have been on unsalted butter overload.  If you are feeling like taking things up a notch, you can even dip them in dark or semi-sweet chocolate like I did.  SO GOOD!

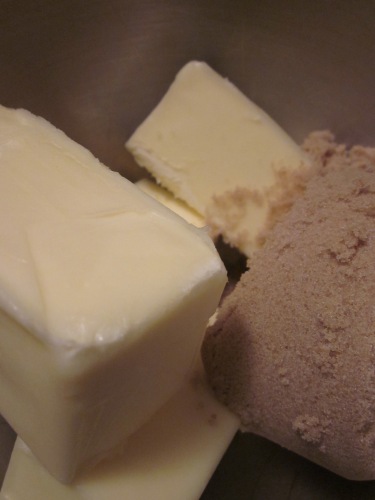
In the bowl of a standing mixer, cream together 1 pound butter and 1 cup brown sugar.

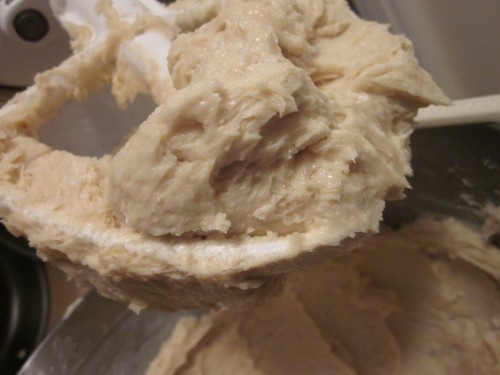
Mix until light and fluffy – about 3 minutes.

With the mixer on slow, add in 3 1/2 cups of your flour, making sure not to add it too quickly and spray it all over your counter – like me.

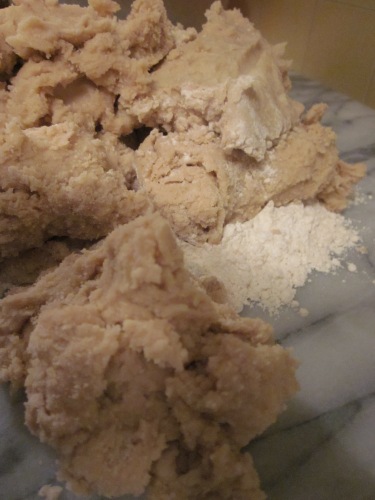
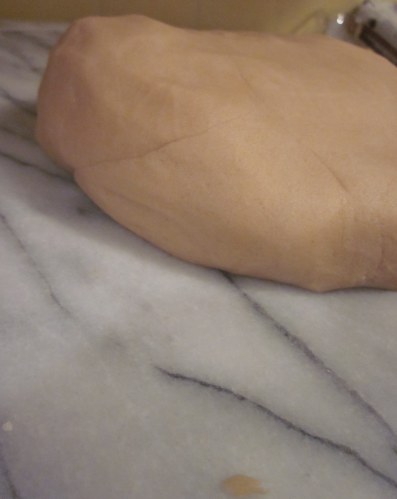
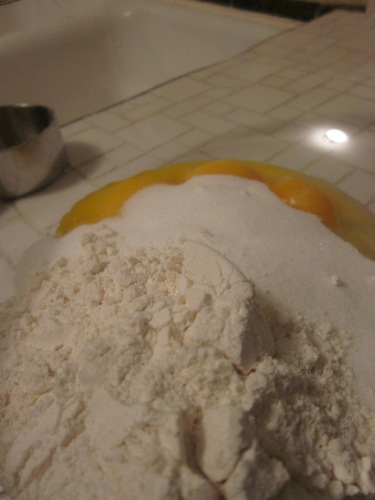
When it seems like the dough is no longer accepting flour, dump the remaining flour on a smooth surface and plop ( couldn’t think of a better word) the dough on top.  Kneed in the remaining flour until you have a smooth dough.  It may seem slightly sticky, but don’t worry – it will roll out perfectly.

Roll out the dough to 1/2 inch thickness.  Try your best to get it in a semi-rectangle shape so that it makes cutting out the cookies easier.

Using a sharp knife or a pizza cutter, trim off the edges so you are left with a big even rectangle.  Slice the cookies into cute even little squares and using a spatula, transfer them to a cookie sheet.

Take a fork and make fork pokes in the cookies.  Bake @ 325 for 20-25 minutes.  The larger your cookies are, the longer they will take to work.  My 2″ by 1 1/2″ cookies took 23 minutes.  They will be golden brown and look like little blond pillows.

You can transfer them to a cooling rack now or later – it doesn’t matter either way!  Repeat with the remaining dough:  roll, shape into a rectangle, cut cookies, transfer and bake.

Once the cookies are completely cool, melt the chocolate in the microwave, setting out 1/3 of the chocolate to mix into the melted chocolate once it is melted.  This will help with the tempering.

Dip the cookies one by one until they are covered by chocolate on one side.  Place on a silicone mat or parchment paper to set.  (I went one step further and sprinkled a little sea salt over the chocolate just before it cooled).

When you bite into these cookies, you taste the richness of the butter, the slight sweet of the chocolate, and the tang of the salt.  The bonus is, you probably have all the ingredients on hand right now!  Go make them!

I don’t just bake.  For the nutritional upkeep of my husband and daughter (and I guess myself), I do have to cook dinner every once in a while.  Since Dan works his crazy schedule, I don’t often have all three of us to cook for.  Meals for just Lillian and I can lack creativity.  We are also trying to stick to a grocery budget and this is MUCH more attainable when I actually plan out my meals.  The hard part lately is that all the things I want to make don’t necessarily work for a working mom – too much prep time or cooking time doesn’t leave us any eating time before Lil heads to bed.

Here is this week’s lineup:

Tonight: Peanut noodles with chicken

Saturday: Butternut Squash and Mascarpone Ravioli

Sunday: Pulled Braised Pork with Apple-Cabbage Slaw

Monday: Beef Stew with Beer and Paprika

Tuesday: leftovers (do you love leftover night as much as me?

Wednesday: BBQ Chicken Pizza

Thursday: Marinated Flank Steak with Chinese Green Beans

Sounds like a yummy week.  What do you have on your menu for this week?

Lillian’s preschool did an exercise the other day with all the kids.  They asked them what they wanted to be when they grow up, how many kids they wanted to have, and what their parents did for a job.

Lillian’s answer: I want to be Ariel so I can dive into the water; five kids; and the best – my daddy works in Seattle and my mommy cooks dinner.


Although her perception might be that I cook dinner when she would like me to be playing dollhouse with her, I do love that she knows I am doing it and someday, we will do it together.

Some of the answers were really quite funny.  My favorite was: My mommy is a doctor and my daddy lays by the pool.  Somehow I am not sure that child’s parents were too thrilled with the BIG posterboard relaying this information.

This dessert is nuts!  Well, anyone who makes this dessert nuts and I guess that says a lot about me.  I attempted this dessert for our final Christmas celebration of the year.  I was going to be in the presence of two wonderful cooks and since they think of me as the “baker,” I had to deliver the goods.  This looked fancy enough and it allowed me to make something I have never made before – meringues!

If you find yourself with a free 3 hours, go for it.  The nice thing is, you can make each of the separate parts separately and assemble them for serving.  Don’t assemble it too far ahead though, the meringues soak up the liquid from the custard.

Meringues:

Line two baking sheets with parchment paper and tape the sides down to make sure that the paper lies flat. (I used blue painters tape as you can see – scotch tape doesn’t work at all)

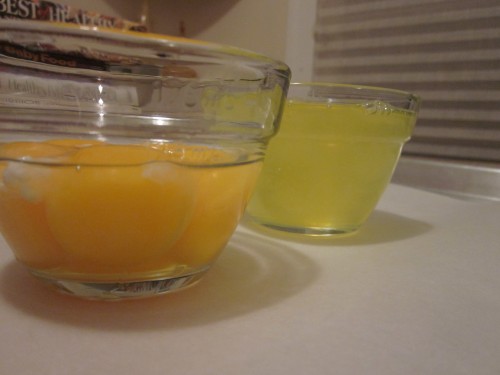
Separate 6 eggs and set the yolks aside.

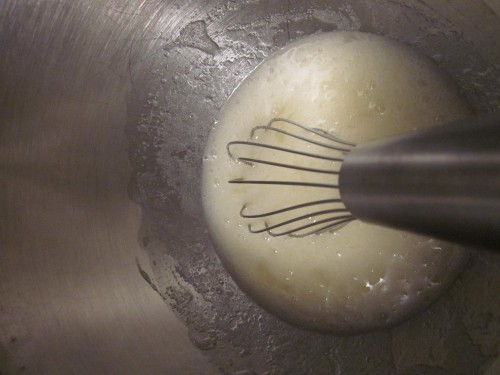
In a heatproof bowl set over simmering water, combine the sugar and egg whites.  Whisk until the sugar dissolves, about 3-5 minutes.  I actually dipped my finger in and rubbed the whites between my fingers to make sure the sugar dissolved.

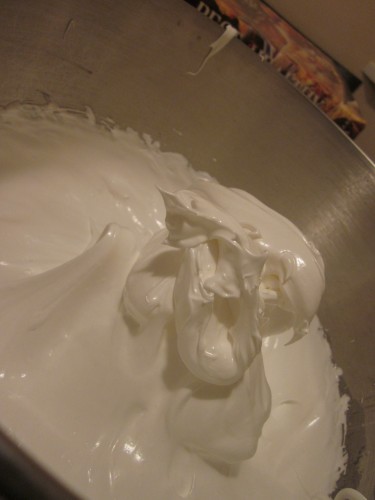
Once all the sugar crystals are dissolved, transfer to a standing mixer and beat until you have stiff peaks.  You can tell you have a stiff peak when you tap the eggs with your beater and they stand straight up.  I made this easy by using my standing mixer bowl on my double broiler.


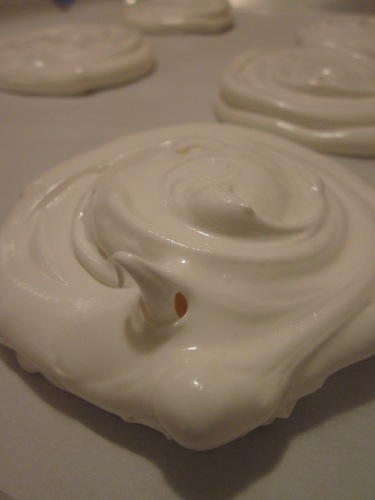
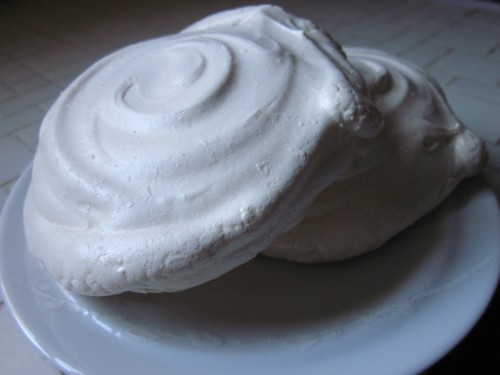
Fold in the vanilla very gently.  Fill your pastry bag about ½ full and pipe the meringues onto the parchment paper.  I didn’t have a big enough tip to make the meringues in one quick circle, so I went over them a second time to increase their height.  ( I am NOT a meringue expert, but it was fun to try something new and they look SO cool!)

Bake for 1 ½ to 2 hours.  The meringues will be crisp and lightly brown.  I actually tapped on the tops to see how hollow they sounded.  Do NOT remove them from the oven.  Turn the oven off and leave them there.  Once completely cool, store the meringues in an airtight container until you are ready to serve.  (Sorry for the strange blue light on this photo.)

Custard:

Here comes the not so fun part.  The efficient way to do this is to make the custard while the meringues are baking.  I, however, did not do this.  I made the meringues the night prior to the custard and made the process VERY long.

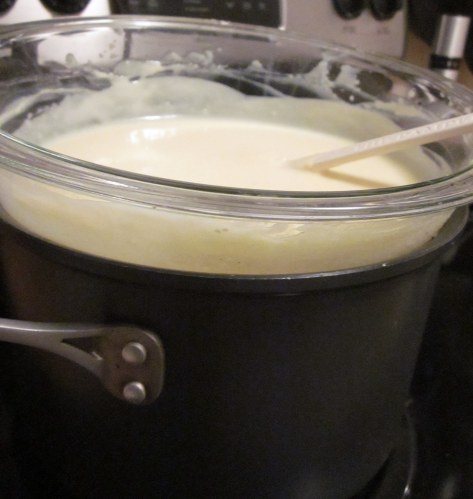
In a heat-proof bowl set over simmering water, whisk together the egg yolks, sugar, salt, and flour.  At the same time, heat the milk in a saucepan until it just starts to foam around the sides.  You do not want it to boil.

Add the milk (mixed with the tsp vanilla) and pour slowly into the eggs.  Whisk until well combined.  Now, you just have to stand there – forever.  It takes over an hour for the custard to reach the right thickness.  I stood there with the latest People magazine so I didn’t get too bored.

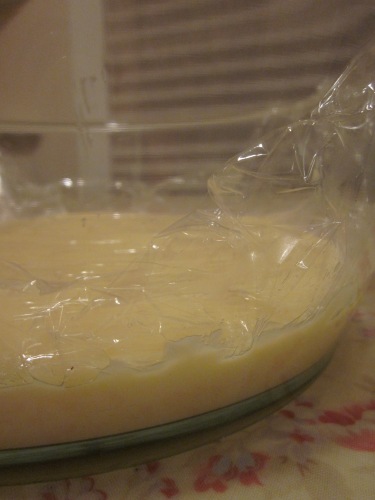
Once it is the right thickness – feels like pudding – push through a fine mesh strainer and cover with plastic wrap.  You need to have the plastic wrap right on top of the pudding so that it doesn’t form a skin.  Allow it to cool to room temperature prior to storing it the refrigerator.

Assembly:

Prepare your whipping cream by mixing the heavy cream with a little bit of sugar – about ¼ cup.  Toast the sliced almonds at 350 degrees for about 8 minutes.

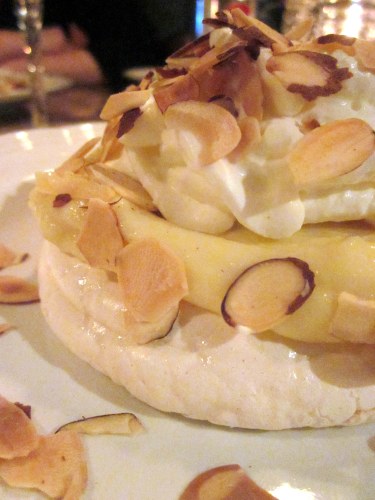
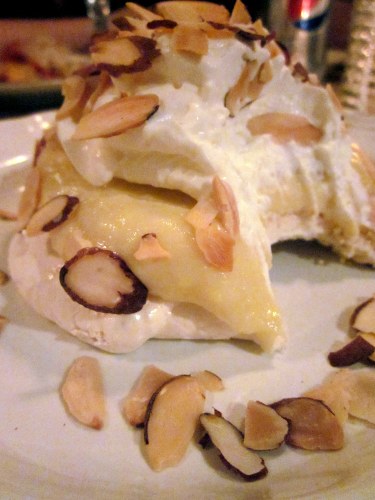
Layer the dessert with a meringue cookie, pudding, whipped cream, and almonds.  SERVE!

It is a stellar presentation and a wonderfully tasting dessert.  Just be prepared to spend some time in the kitchen.

Angel Icebox Dessert
adapted from Hot Polka Dot

Meringue:

6 egg whites
1 1/2 cup granulated sugar
1 tsp vanilla extract

Custard:

6 egg yolks
3/4 cup granulated sugar
1/4 tsp salt
1/3 cup flour
3 cup whole milk
1 tsp vanilla extract

1 pint whipping cream
Almonds, sliced and toasted for garnish

Preheat oven to 200 degrees.  Line two baking sheets with parchment paper and tape down flat with masking (or painter’s tape.)

Meringue: Mix together egg whites and sugar in a heat-proof bowl and place over simmering water.  Dissolve the sugar – takes about 3-5 minutes.  Transfer to a standing mixer and mix at high speed until stiff peaks form.  Gently fold in vanilla and fill a pastry bag 1/2 full with meringue.  Using a large decorating tip, create rosettes on the baking sheets.  Once they are the desired size and height, bake for 1 1/2 to 2 hours or until the meringues are crisp, slightly browned, and sound hollow when tapped.

Custard: In a heat-proof bowl, combine the egg yolks, sugar, salt, and flour and set over a pan filled with simmering water.  In a separate saucepan, heat the milk until foam forms around the edges – do not boil.   Stir in the vanilla and then slowly pour the hot milk into the egg mixture, whisking until completely combined.  Stirring constantly, cook the custard until it reaches the consistency of thick pudding.  Remove from the heat and push through a fine sieve into another bowl.  Cover with plastic wrap, placing the wrap directly on the custard to prevent a skin from forming.  Allow to cool to room temperature and refrigerate until ready to serve.

Assembly: Toast the sliced almonds in a 350 degree oven for 8 minutes.  Whisk the whipping cream with a 1/4 cup sugar.  On a serving plate, place one meringue cookie, top with custard, whipping cream, and toasted almonds.

So – does anyone else have a dessert that has taken FOREVER, but was totally worth it in the end?

I don’t know how I missed it, but this weekend is a three day weekend and I.HAVE.NOTHING.PLANNED! Until today. Normally, my baking/cooking is relegated to the end of the day after work when natural lighting is not an option and my pictures turn out dingy and dull. I also don’t have the energy to do anything with too many steps or ingredients (hence the 3 ingredient shortbread I made last night.)

However, when I found out that I would have THREE whole days to cook and bake until my heart’s content, I decided to climb some never before attempted culinary mountains. And, I hope that by writing them down here, I will actually do it.

I felt like I needed to counteract the sweets with some savory items (so my husband doesn’t tell me to stop blogging due to his mass consumption of my baked goods), but they just aren’t as much fun to make or eat.  I did have one idea of how to bring the savory into it by attempting homemade pasta  in the form of Butternut Squash Ravioli with some kind of sauce.  I can’t decide between a whiskey cream sauce and an orange/balsamic sauce. Suggestions?

Also, I am tackling the french macaroon by making Pistachio Cocoa Nib Macaroons with Bourbon Buttercream.  Apparently, if you can master the french macaroon, anything is possible.

My final item will be either a Burnt Sugar Bundt Cake or a layered Crepe Cake. The first involves crackling hard burnt sugar shards and if anyone knows me and my history with hot liquid sugar, you are right to be concerned. The latter cake would teach me how to make crepes – it is a beautifully layered cake made of 20 crepes and delicious pastry cream.

Of those options, which would you choose to make if you had three days to cook and bake whatever you chose?